使用 Kotlin 创建 Spring Boot 项目
本教程的第 1 部分演示如何在 IntelliJ IDEA 中使用 Project Wizard 创建一个 Spring Boot 的 Gradle 项目.
开始之前的准备
下载并安装 IntelliJ IDEA Ultimate Edition 的最新版.
创建 Spring Boot 项目
使用 IntelliJ IDEA Ultimate Edition 中的 Project Wizard, 创建新的使用 Kotlin 的 Spring Boot 项目:
在 IntelliJ IDEA 中, 选择 File | New | Project.
在左侧面板中, 选择 New Project | Spring Boot.
在 New Project 窗口中, 指定以下项目和选项:
Name: demo
Language: Kotlin
Type: Gradle - Kotlin
Package name: com.example.demo
JDK: Java JDK
Java: 17
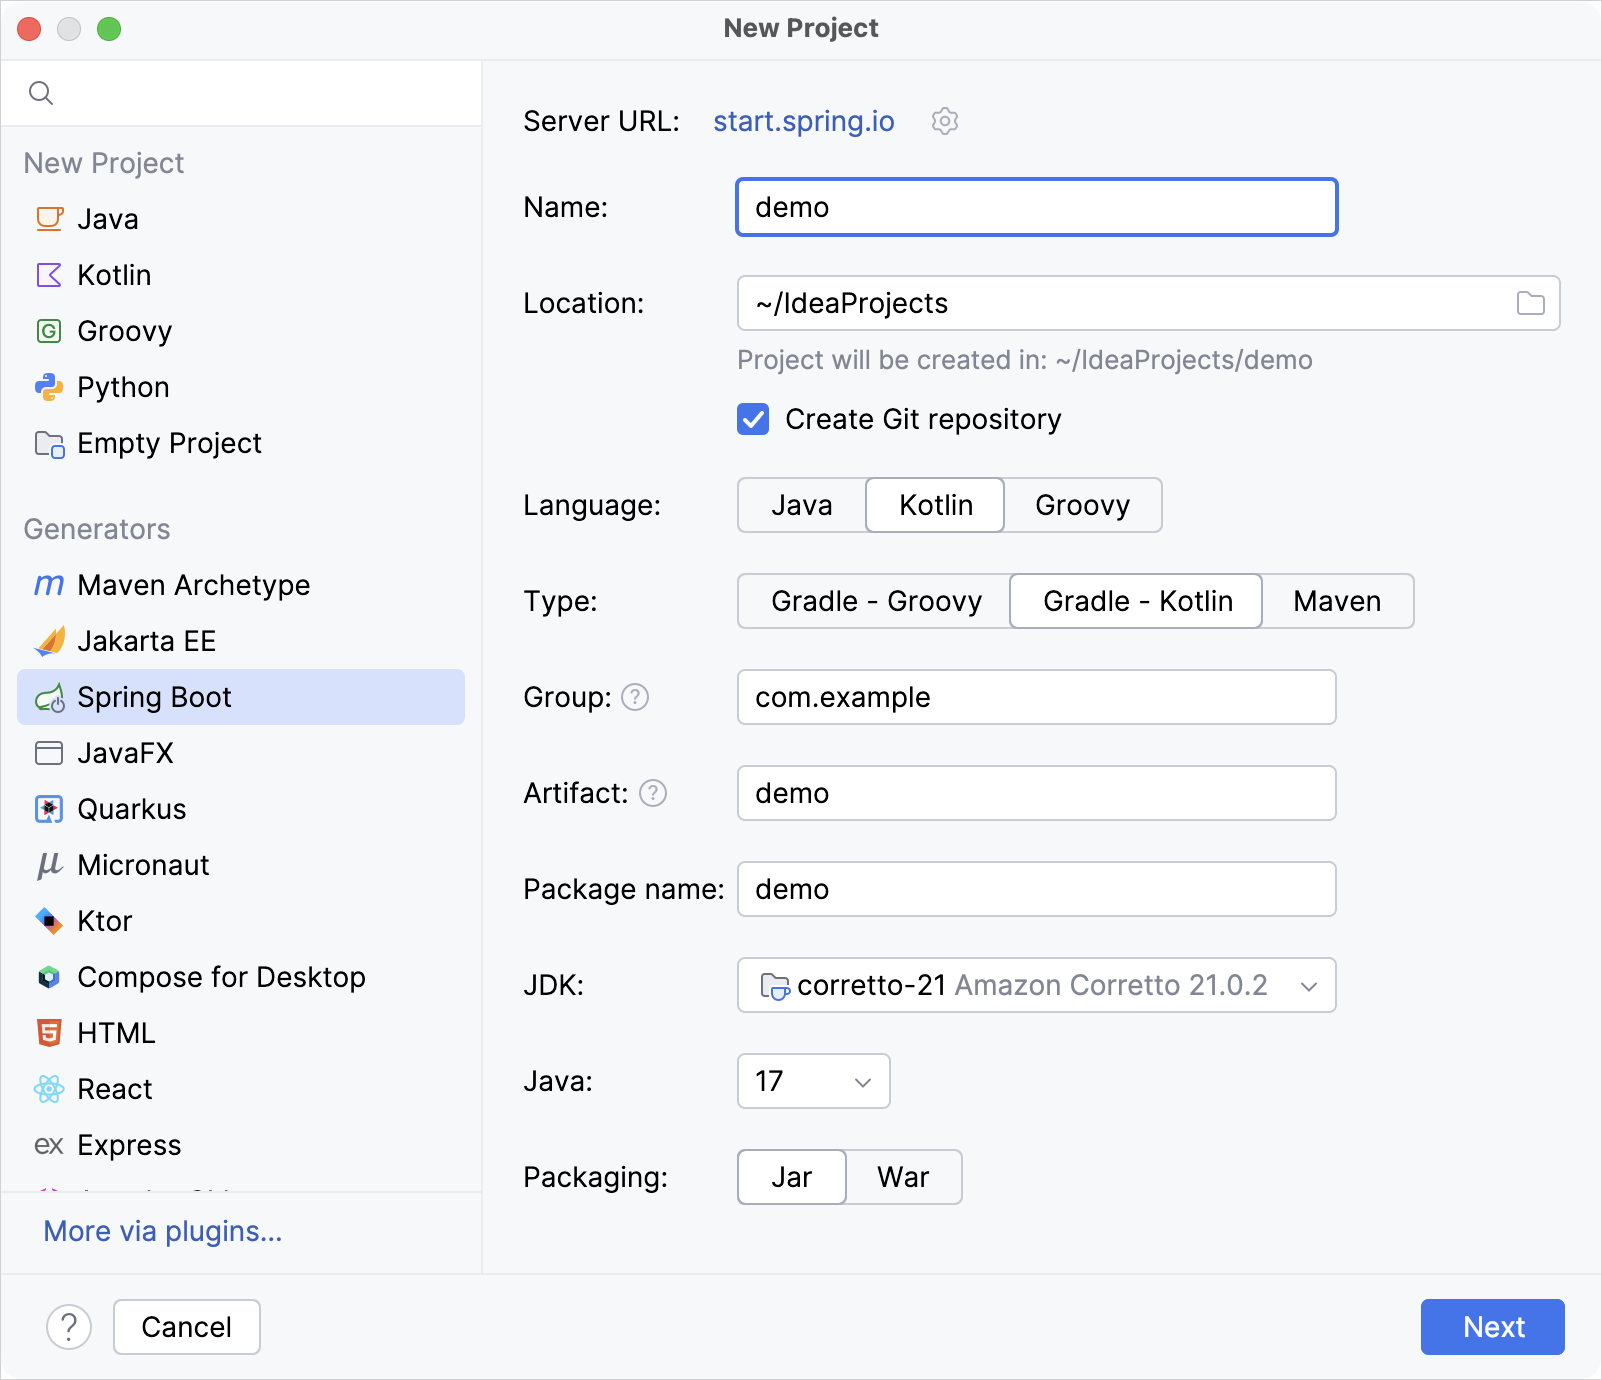
确认填写了所有的项目, 然后点击 Next.
选择以下依赖项, 本教程将会需要它们:
Web | Spring Web
SQL | Spring Data JDBC
SQL | H2 Database
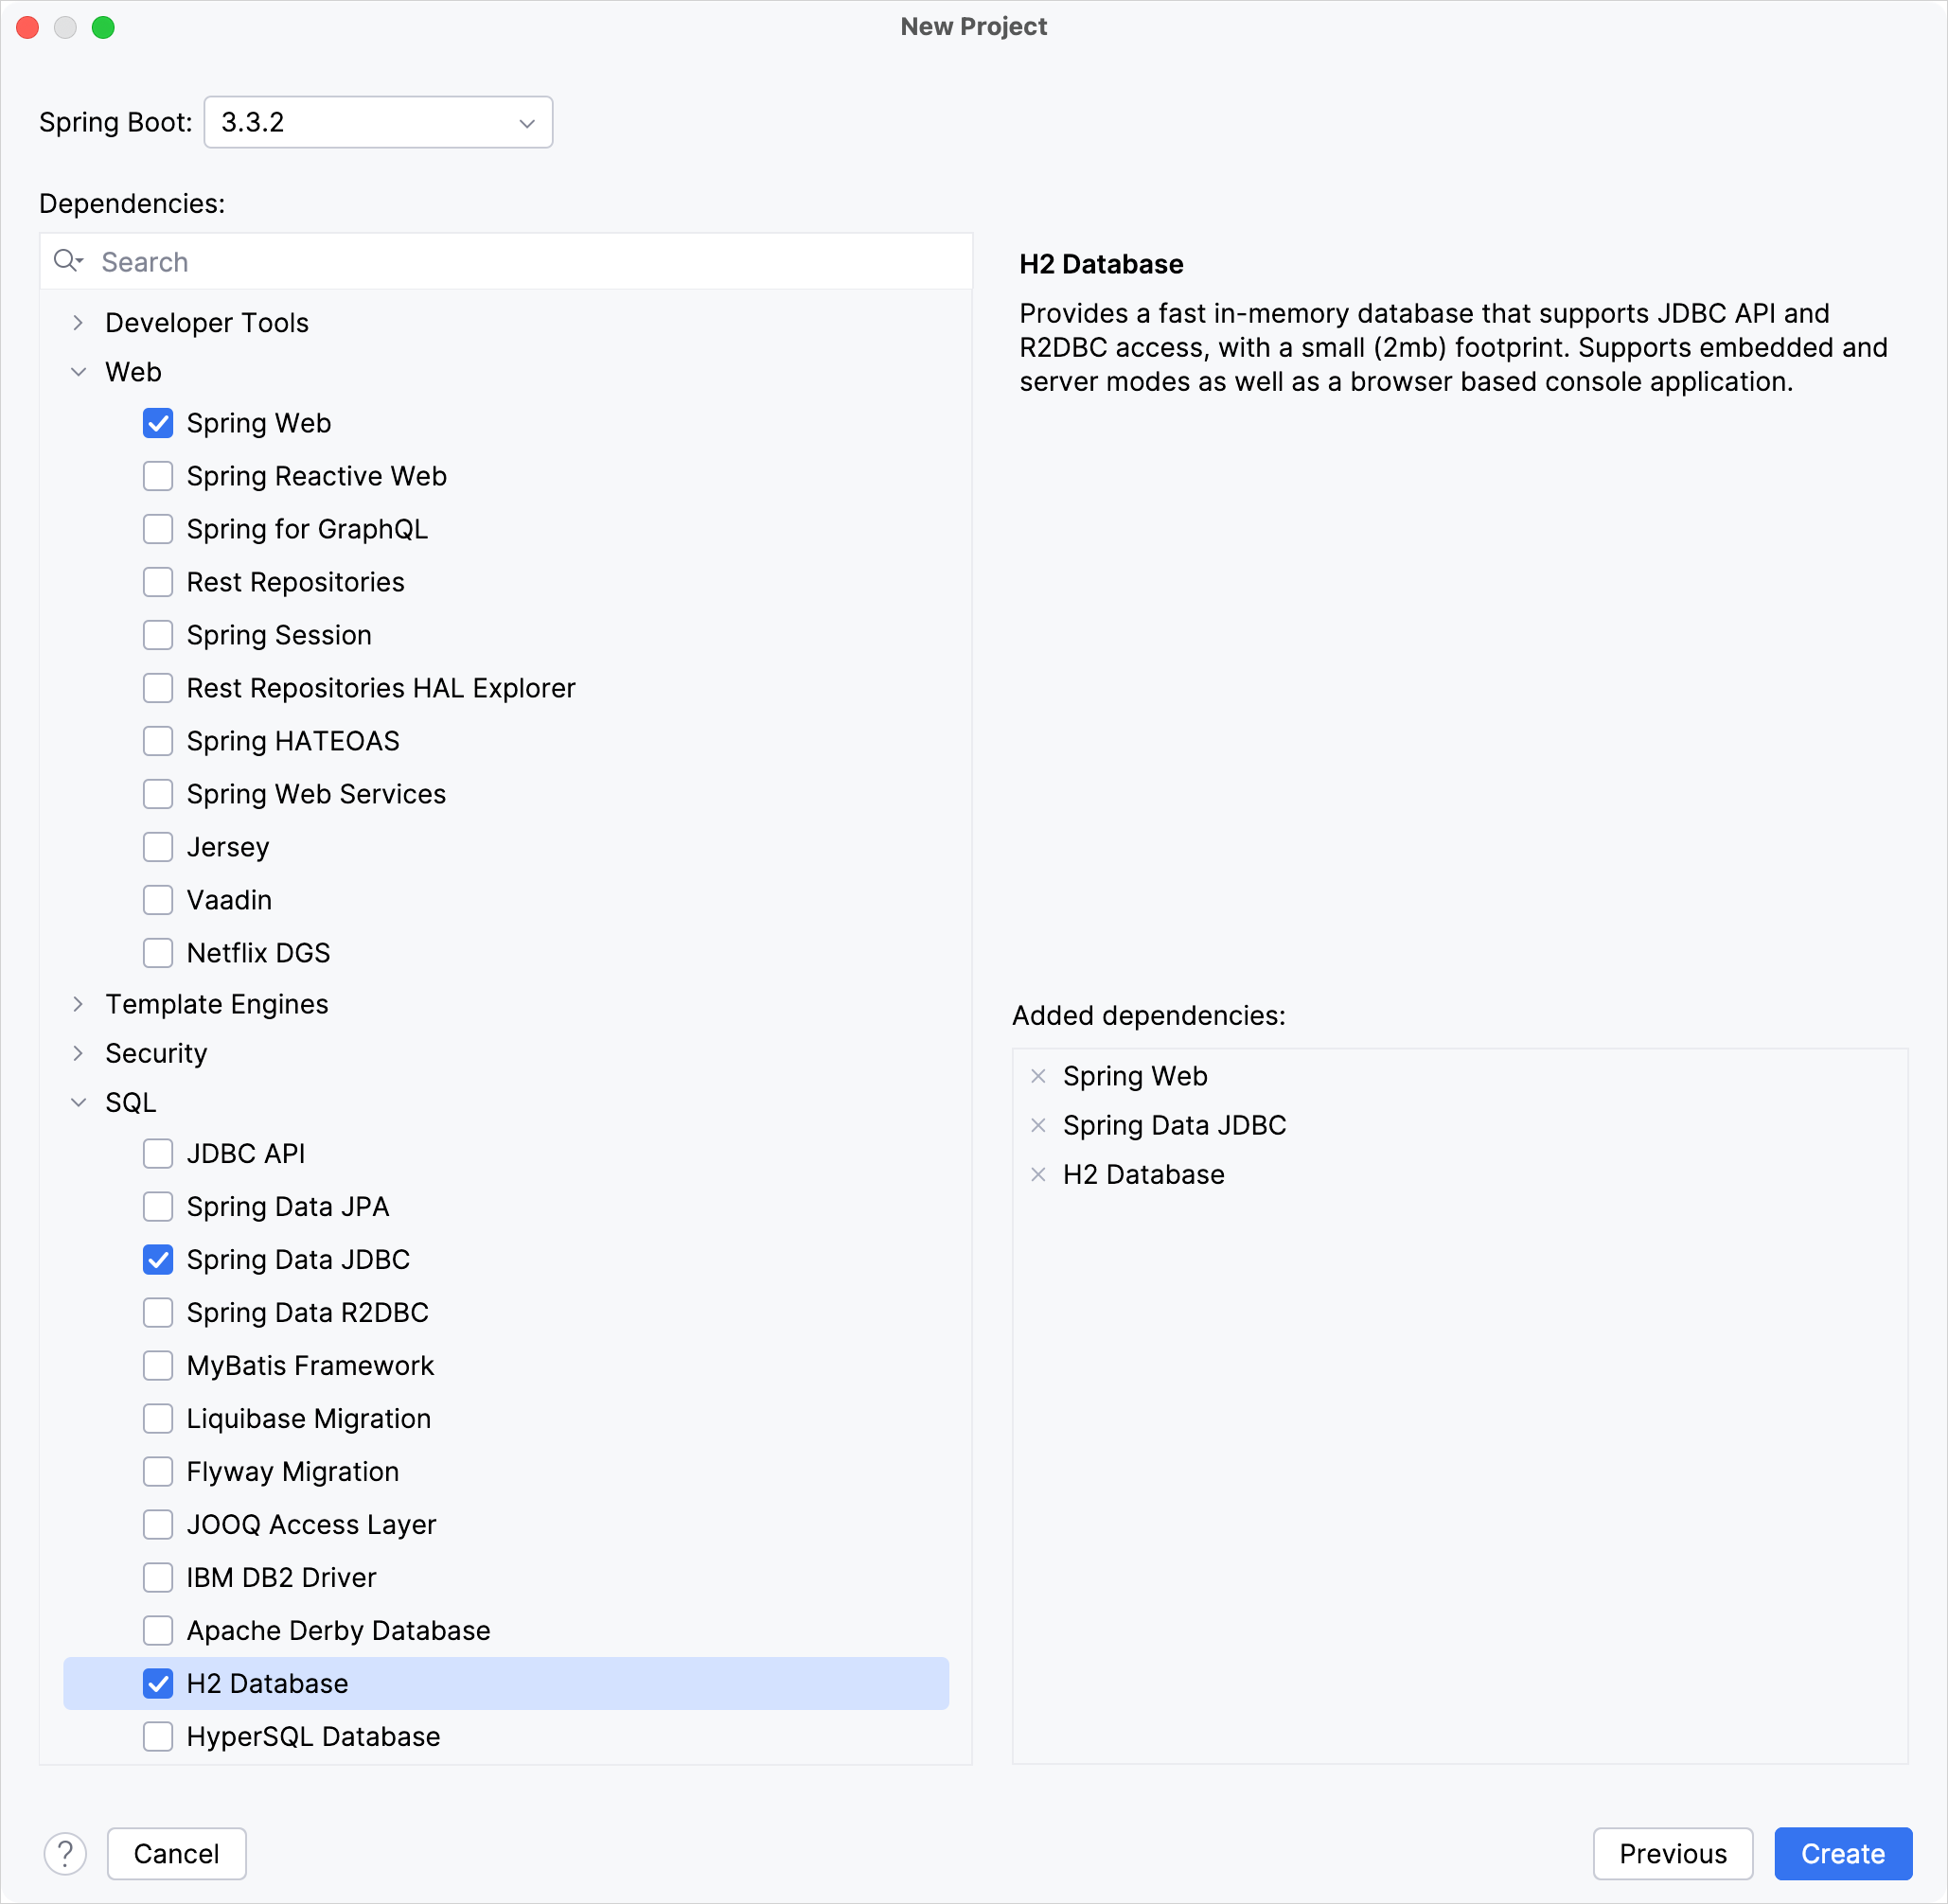
点击 Create, 生成并设置项目.
之后, 你可以在 Project view 中看到下面的项目结构:
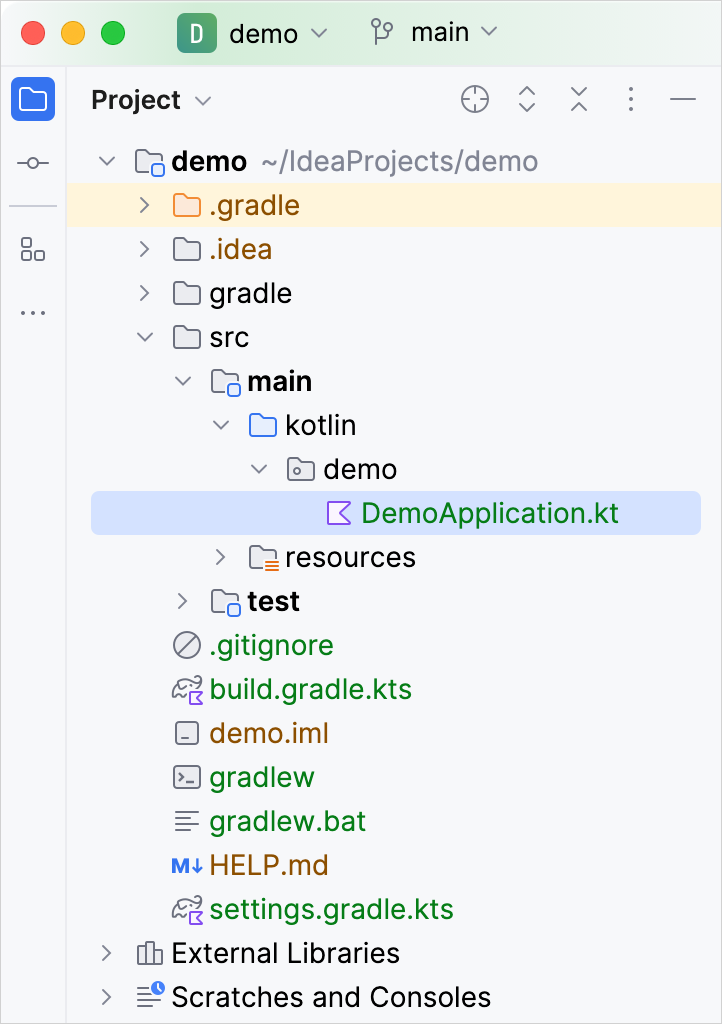
生成的 Gradle 项目符合 Maven 的标注目录布局:
在
main/kotlin文件夹下是属于应用程序的包和类.应用程序的入口点是
DemoApplication.kt文件的main()方法.
查看项目的 Gradle 构建文件
打开 build.gradle.kts 文件: 它是 Gradle Kotlin 构建脚本, 包含应用程序需要的依赖项目列表.
Gradle 文件是用于 Spring Boot 的标准内容, 但它也包含必须的 Kotlin 依赖项, 包括 kotlin-spring Gradle plugin – kotlin("plugin.spring").
下面是完整的脚本, 包括各部分和依赖项的解释:
你可以看到, Gradle 构建文件中添加了几个与 Kotlin 相关的库:
在
plugins代码段中, 有 2 个 Kotlin 库:kotlin("jvm")– 这个 plugin 定义在项目中使用的 Kotlin 版本kotlin("plugin.spring")– Kotlin Spring 编译器 plugin, 用于向 Kotlin 类添加open修饰符, 使它们能够与 Spring Framework 中的功能兼容
在
dependencies代码段中, 有几个 Kotlin 相关的模块:com.fasterxml.jackson.module:jackson-module-kotlin– 这个模块支持Kotlin 类和数据类的序列化和反序列化org.jetbrains.kotlin:kotlin-reflect– Kotlin 反射库
在依赖项之后, 你可以看到
kotlinplugin 配置模块. 在这里你可以向编译器添加额外的参数, 来启用或禁用某些语言特性.
关于 Kotlin 编译器选项, 详情请参见 Kotlin Gradle plugin 中的编译器选项.
查看生成的 Spring Boot 应用程序
打开 DemoApplication.kt 文件:
- 声明类 – DemoApplication 类
在包声明和 import 语句之后, 你可以看到第一个类声明,
class DemoApplication.在 Kotlin 中, 如果一个类不包含任何成员 (属性或函数), 你可以直接省略掉类的主体部分 (
{}).- @SpringBootApplication 注解
@SpringBootApplication 注解在 Spring Boot 应用程序中是一个很方便的注解. 它会启用 Spring Boot 的 自动配置, 组件扫描, 而且可以对 "应用程序类" 定义额外的配置.".- 程序入口点 – main()
main()函数是应用程序的入口点.它声明为在
DemoApplication类之外的一个 顶层函数.main()函数调用 Spring 的runApplication(*args)函数, 使用 Spring Framework 来启动应用程序.- 可变参数 – args: Array<String>
查看
runApplication()函数的声明, 你会看到函数的参数标记了vararg修饰符:vararg args: String. 这表示, 你可以向这个函数传递可变数量的字符串参数.- 展开(spread)操作符 – (*args)
args是main()函数的参数, 它声明为一个字符串数组. 由于存在的是字符串的数组, 而你想要将它的内容传递给函数, 请使用展开(spread)操作符 (在数组之前加上星号*).
创建 Controller
应用程序已经可以运行了, 但我们先来更新它的逻辑.
在 Spring 应用程序中, Controller 用来处理 Web 请求. 在相同的包中, 在 DemoApplication.kt 文件的旁边, 创建 MessageController.kt 文件, 其中包含 MessageController 类, 如下:
- @RestController 注解
你需要告诉 Spring,
MessageController是一个 REST Controller, 因此你应该对它标注@RestController注解.这个注解表示这个类将会被组件扫描识别, 因为它和我们的
DemoApplication类处在相同的包内.- @GetMapping 注解
@GetMapping标注 REST Controller 的函数, 它实现了与 HTTP GET 调用对应的 endpoint:@GetMapping("/") fun index(@RequestParam("name") name: String) = "Hello, $name!"- @RequestParam 注解
函数参数
name标注了@RequestParam注解. 这个注解表示方法参数应该绑定到一个 Web 请求参数.因此, 如果你访问应用程序的根路径, 并提供一个请求名为 "name" 的参数, 例如
/?name=<your-value>, 这个参数值将会被用做调用index()函数时的参数.- 单表达式函数 – index()
由于
index()函数只包含一条语句, 你可以将它声明为一个 单表达式函数.意思就是说, 大括号可以省略, 函数体直接放在等号
=之后.- 函数返回值的类型推断
index()函数没有明确声明返回类型. 编译器会查看等号=右侧语句的结果, 以此推断返回类型.Hello, $name!表达式的类型是String, 因此函数的返回类型也是String.- 字符串模板 – $name
Hello, $name!表达式在 Kotlin 中称为 字符串模板.字符串模板是字符串的字面值, 其中包含内嵌的表达式.
对于字符串的拼接操作, 这是一个很方便的替代方法.
运行应用程序
Spring 应用程序现在可以运行了:
在
DemoApplication.kt文件中, 点击main()方法侧栏中的绿色 Run 图标: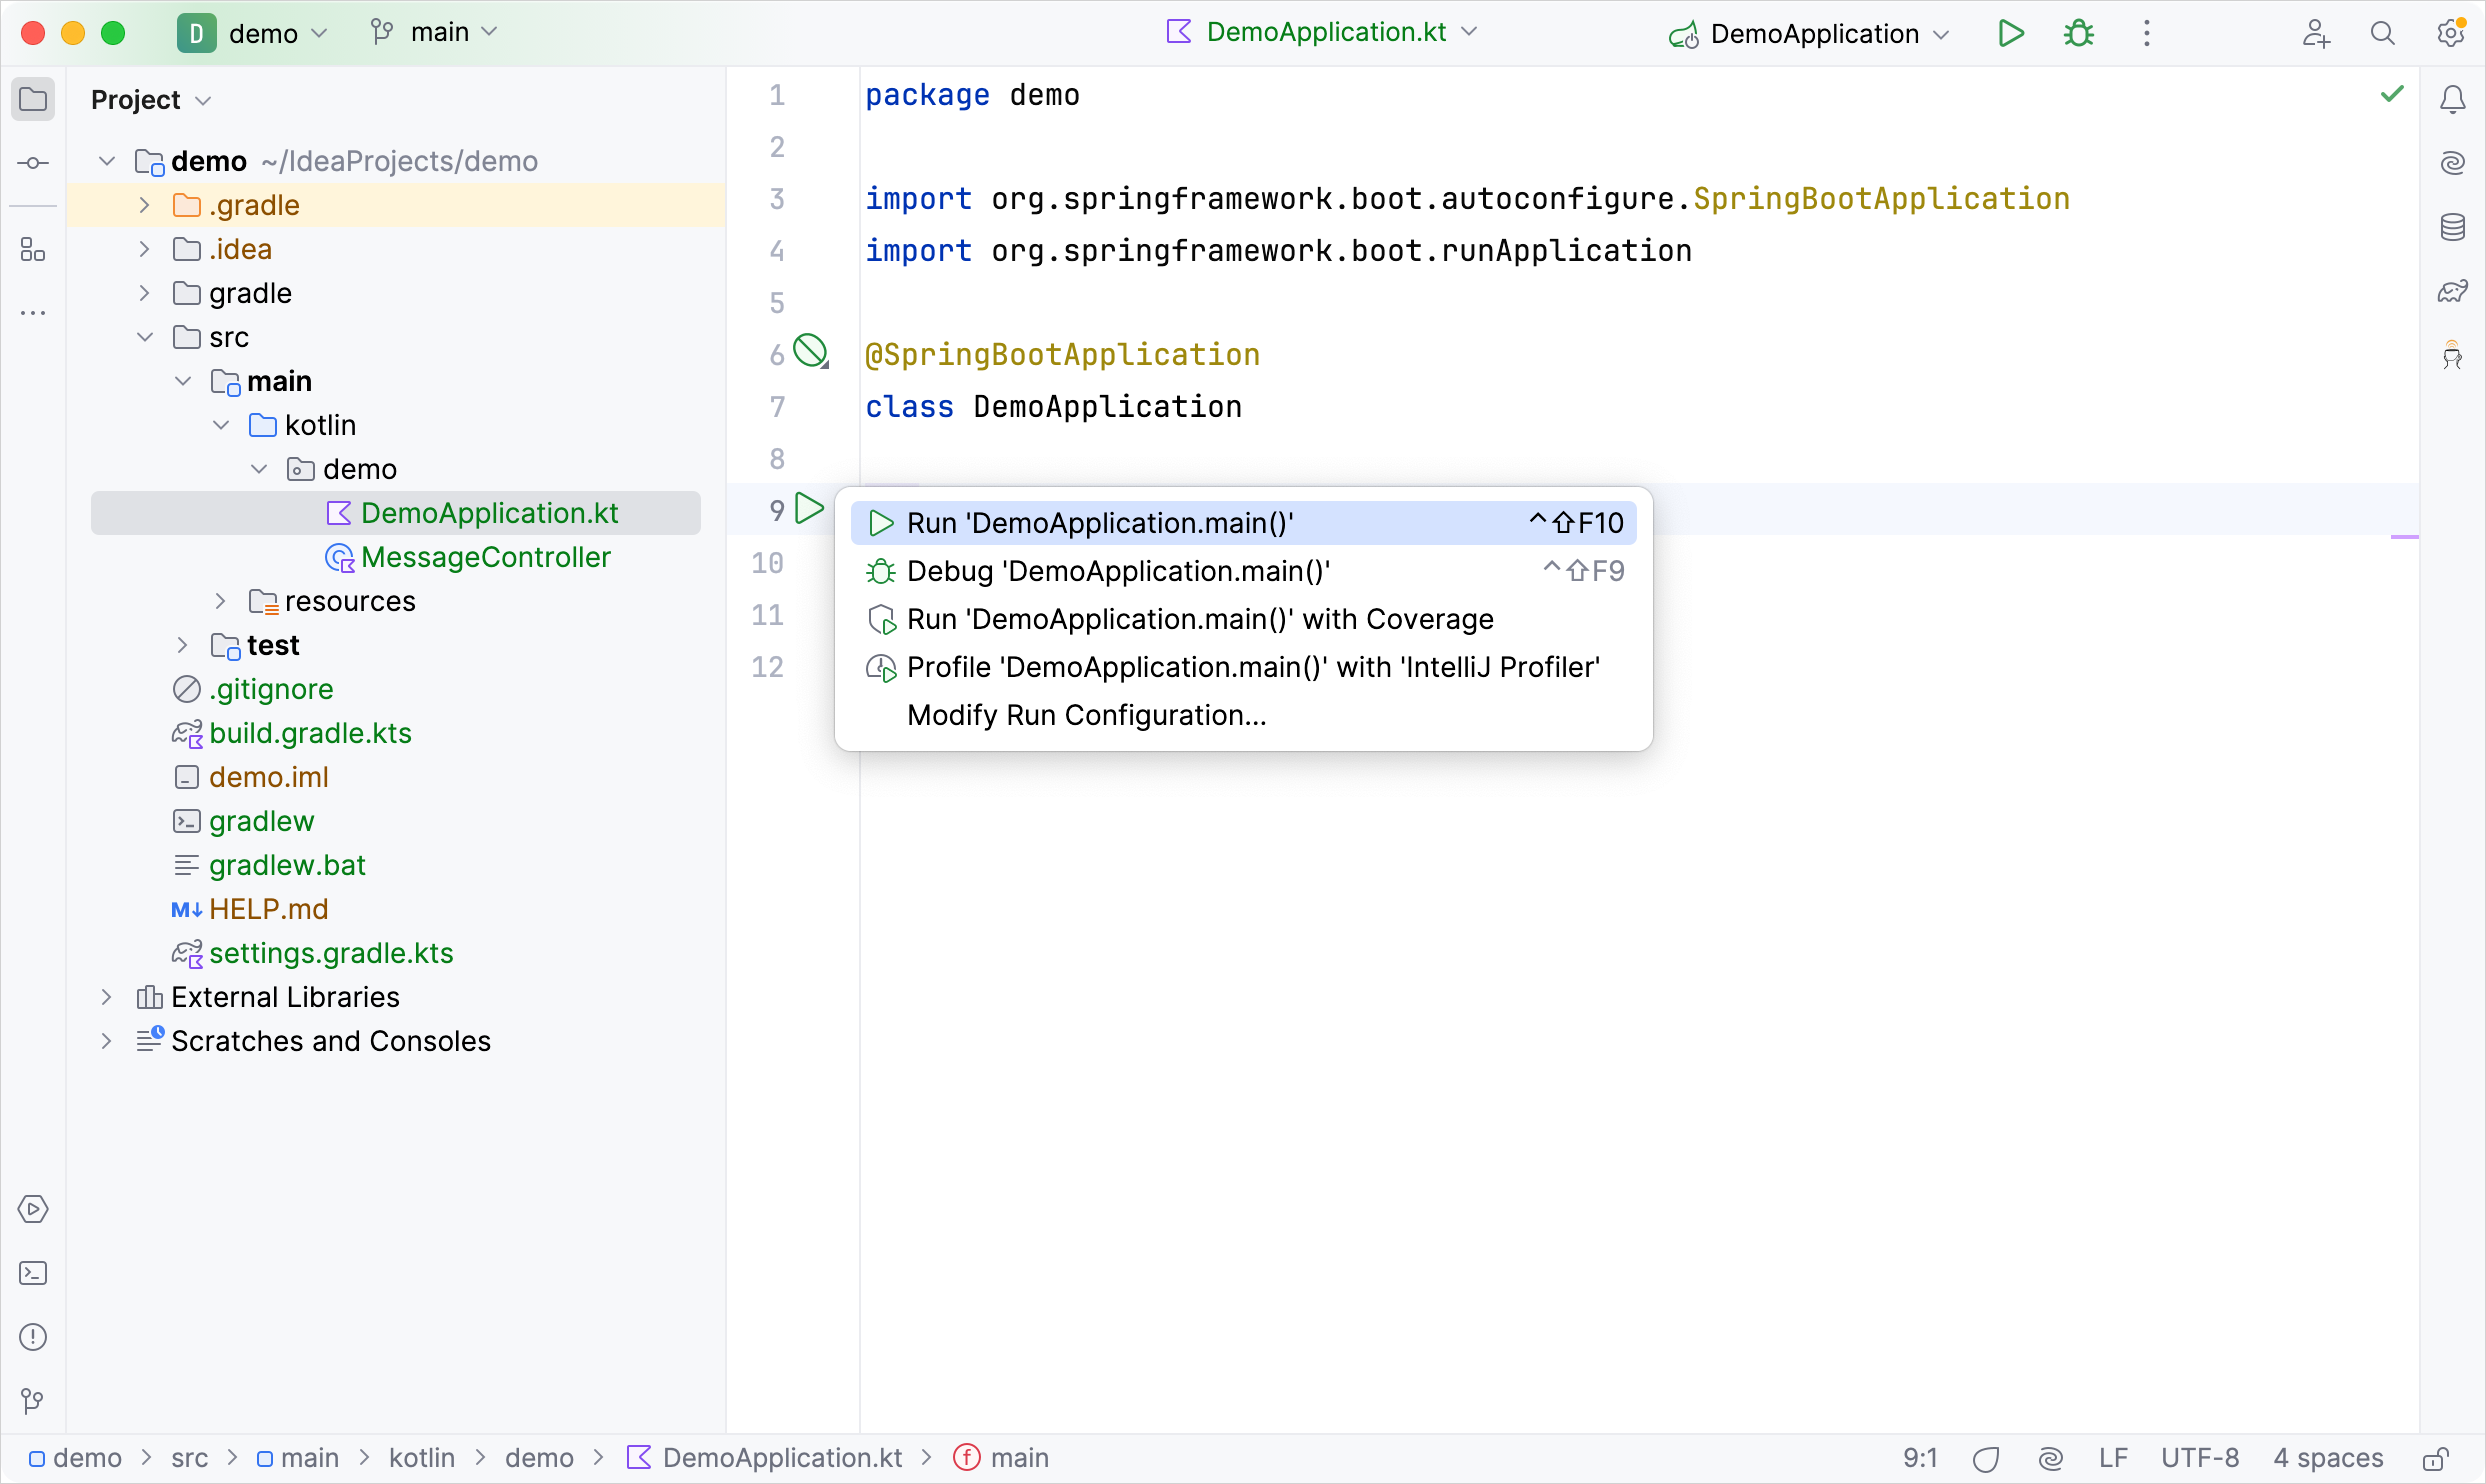
这样会在你的计算机上启动本地服务器.
应用程序启动后, 请打开以下 URL:
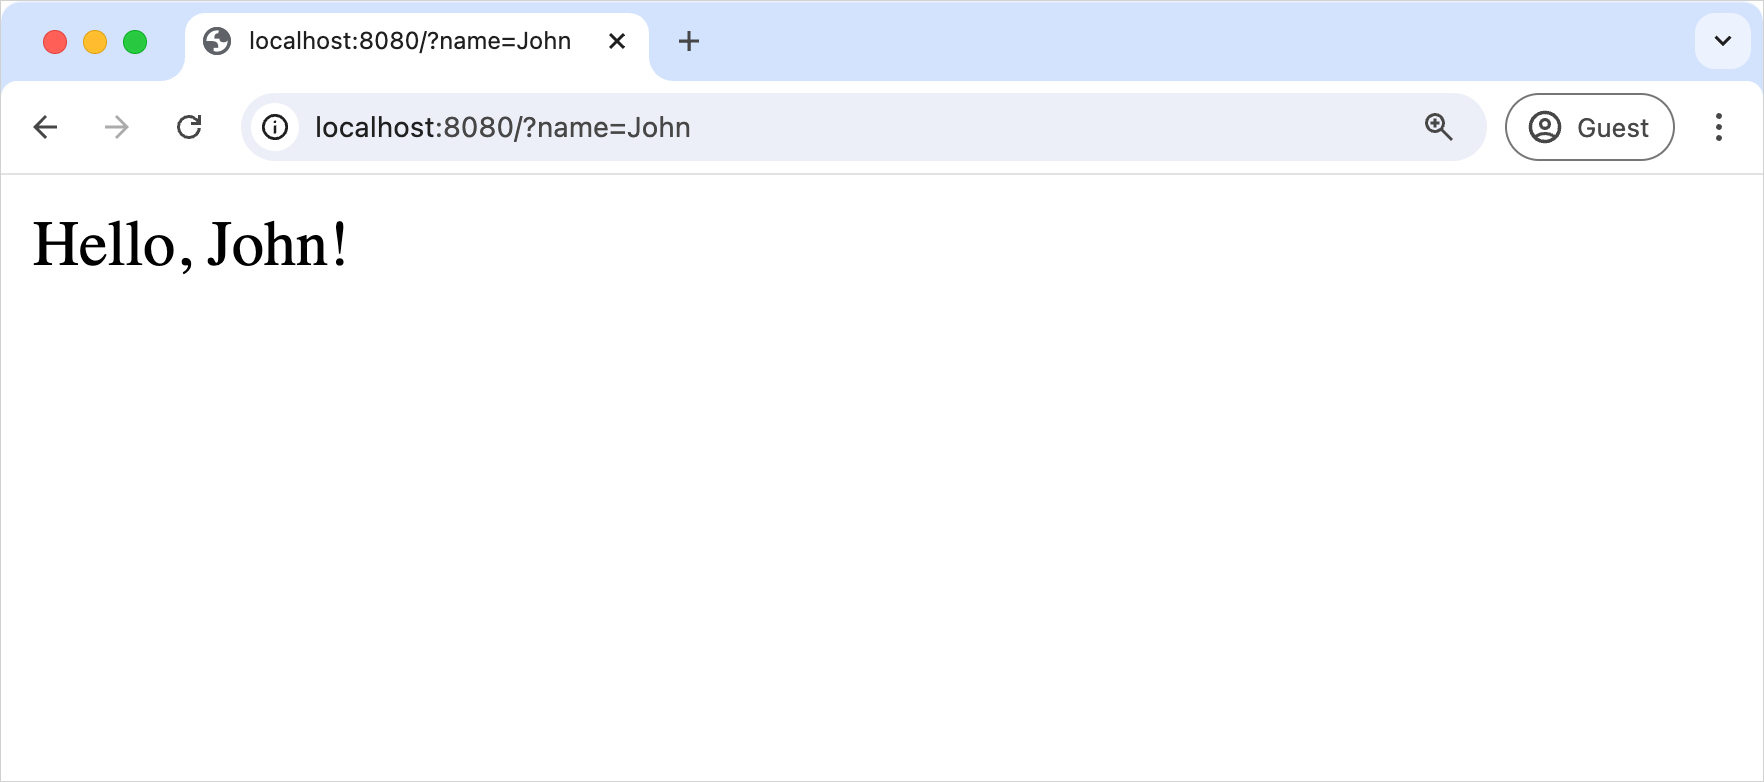
http://localhost:8080?name=John你会看到输出的结果 "Hello, John!":
下一步
本教程的下一部分中, 你将学习 Kotlin 数据类, 以及如何在你的应用程序中使用.