教程 - 使用 Kotlin 和 JUnit 测试 Java 代码
Kotlin 与 Java 完全兼容互通, 因此你可以使用 Kotlin 为 Java 代码编写测试, 并与项目中已有的 Java 测试一起运行.
在本教程中, 你将学习如何:
配置 Java-Kotlin 混合项目, 使用 JUnit 运行测试.
添加 Kotlin 测试, 用于验证 Java 代码.
使用 Maven 或 Gradle 运行测试.
配置项目
在 IDE 中, 从版本控制系统中克隆示例项目:
https://github.com/kotlin-hands-on/kotlin-junit-sample.git进入
initial模块, 查看项目结构:kotlin-junit-sample/ ├── initial/ │ ├── src/ │ │ ├── main/java/ # Java 源代码 │ │ └── test/java/ # Java 编写的 JUnit 测试 │ ├── pom.xml # Maven 配置 │ └── build.gradle.kts # Gradle 配置initial模块包含一个简单的 Java Todo 应用程序, 带有一个测试.在同一目录中, 打开构建文件, 更新其内容, 以便支持 Kotlin:
<?xml version="1.0" encoding="UTF-8"?> <project xmlns="http://maven.apache.org/POM/4.0.0" xmlns:xsi="http://www.w3.org/2001/XMLSchema-instance" xsi:schemaLocation="http://maven.apache.org/POM/4.0.0 http://maven.apache.org/xsd/maven-4.0.0.xsd"> <modelVersion>4.0.0</modelVersion> <groupId>org.jetbrains.kotlin</groupId> <artifactId>kotlin-junit-complete</artifactId> <version>1.0-SNAPSHOT</version> <name>kotlin-junit-complete</name> <url>https://kotlinlang.org/docs/jvm-test-using-junit.htm</url> <properties> <project.build.sourceEncoding>UTF-8</project.build.sourceEncoding> <maven.compiler.release>17</maven.compiler.release> <jexer.version>1.6.0</jexer.version> <kotlin.version>2.4.20</kotlin.version> </properties> <dependencyManagement> <dependencies> <dependency> <groupId>org.junit</groupId> <artifactId>junit-bom</artifactId> <version>6.0.3</version> <type>pom</type> <scope>import</scope> </dependency> </dependencies> </dependencyManagement> <dependencies> <dependency> <groupId>org.junit.jupiter</groupId> <artifactId>junit-jupiter-api</artifactId> <scope>test</scope> </dependency> <!-- 向 test 运行期, 添加 JUnit Jupiter 引擎 --> <dependency> <groupId>org.junit.jupiter</groupId> <artifactId>junit-jupiter-engine</artifactId> <scope>test</scope> </dependency> <!-- 可选设定: 支持参数化测试 --> <dependency> <groupId>org.junit.jupiter</groupId> <artifactId>junit-jupiter-params</artifactId> <scope>test</scope> </dependency> <dependency> <groupId>com.gitlab.klamonte</groupId> <artifactId>jexer</artifactId> <version>${jexer.version}</version> </dependency> </dependencies> <build> <pluginManagement><!-- 锁定 plugin 版本, 避免使用 Maven 的默认值 (可以移动到父 pom 文件) --> <plugins> <!-- Clean lifecycle, 参见 https://maven.apache.org/ref/current/maven-core/lifecycles.html#clean_Lifecycle --> <plugin> <artifactId>maven-clean-plugin</artifactId> <version>3.4.0</version> </plugin> <!-- Default lifecycle, 打包 jar 文件: 参见 https://maven.apache.org/ref/current/maven-core/default-bindings.html#Plugin_bindings_for_jar_packaging --> <plugin> <artifactId>maven-resources-plugin</artifactId> <version>3.3.1</version> </plugin> <plugin> <artifactId>maven-surefire-plugin</artifactId> <version>3.3.0</version> </plugin> <plugin> <artifactId>maven-jar-plugin</artifactId> <version>3.4.2</version> </plugin> <plugin> <artifactId>maven-install-plugin</artifactId> <version>3.1.2</version> </plugin> <plugin> <artifactId>maven-deploy-plugin</artifactId> <version>3.1.2</version> </plugin> <!-- Site lifecycle, 参见 https://maven.apache.org/ref/current/maven-core/lifecycles.html#site_Lifecycle --> <plugin> <artifactId>maven-site-plugin</artifactId> <version>3.12.1</version> </plugin> <plugin> <artifactId>maven-project-info-reports-plugin</artifactId> <version>3.6.1</version> </plugin> <!-- 使用 Kotlin 扩展时, 不需要 maven-compiler-plugin --> </plugins> </pluginManagement> <plugins> <!-- 对 main 和 test 代码, 启用 Kotlin Maven plugin --> <plugin> <groupId>org.jetbrains.kotlin</groupId> <artifactId>kotlin-maven-plugin</artifactId> <version>${kotlin.version}</version> <extensions>true</extensions> </plugin> </plugins> </build> </project>在
<properties>部分, 设置 Kotlin 版本.在
<dependencies>部分, 添加 JUnit Jupiter 依赖项, 以便运行测试.在
<build><plugins>部分, 应用kotlin-maven-plugin, 并将<extensions>设置为true. 这个设置会自动向构建中添加相应的执行配置和kotlin-stdlib依赖项.使用带有 extensions 的 Kotlin Maven plugin 时, 不需要向
<build><pluginManagement>部分添加maven-compiler-plugin.
// build.gradle.kts group = "org.jetbrains.kotlin" version = "1.0-SNAPSHOT" description = "kotlin-junit-complete" java.sourceCompatibility = JavaVersion.VERSION_17 plugins { application kotlin("jvm") version "2.4.20" } kotlin { jvmToolchain(17) } application { mainClass.set("org.jetbrains.kotlin.junit.App") } repositories { mavenCentral() } dependencies { implementation("com.gitlab.klamonte:jexer:1.6.0") testImplementation(kotlin("test")) testImplementation(libs.org.junit.jupiter.junit.jupiter.api) testImplementation(libs.org.junit.jupiter.junit.jupiter.params) testRuntimeOnly(libs.org.junit.jupiter.junit.jupiter.engine) testRuntimeOnly(libs.org.junit.platform.junit.platform.launcher) } tasks.test { useJUnitPlatform() }在
plugins {}代码块中, 添加kotlin("jvm")plugin.设置 JVM 工具链版本, 与 Java 版本匹配.
在
dependencies {}代码块中, 添加kotlin.test库, 该库提供 Kotlin 的测试工具, 与 JUnit 集成.
Kotlin/JVM 支持 JUnit 的最新稳定版本, JUnit 6. 你可以在
gradle/libs.versions.toml版本目录中找到它.如果你更倾向于使用版本目录, 甚至可以在版本目录中添加
kotlin("jvm")plugin:# gradle/libs.versions.toml [versions] kotlin = "2.4.20" junit = "6.0.3" [libraries] org-junit-jupiter-junit-jupiter-api = { module = "org.junit.jupiter:junit-jupiter-api", version.ref = "junit" } org-junit-jupiter-junit-jupiter-params = { module = "org.junit.jupiter:junit-jupiter-params", version.ref = "junit" } org-junit-jupiter-junit-jupiter-engine = { module = "org.junit.jupiter:junit-jupiter-engine", version.ref = "junit" } org-junit-platform-junit-platform-launcher = { module = "org.junit.platform:junit-platform-launcher" } [plugins] kotlinJvm = { id = "org.jetbrains.kotlin.jvm", version.ref = "kotlin" }在 IDE 中重新加载构建文件.
关于构建文件设置, 详情请参见 项目配置.
添加你的第一个 Kotlin 测试
initial/src/test/java 中的 TodoItemTest.java 测试已经验证了应用程序的基础功能: 包括条目创建, 默认值, 唯一 ID, 以及状态变更.
你可以通过添加 Kotlin 测试, 验证存储库级别的行为, 来扩展测试覆盖范围:
进入相同的测试源代码目录
initial/src/test/java.在与 Java 测试相同的包中创建
TodoRepositoryTest.kt文件.创建测试类, 包含字段声明和 setup 函数:
package org.jetbrains.kotlin.junit import org.junit.jupiter.api.BeforeEach import org.junit.jupiter.api.Assertions import org.junit.jupiter.api.Test import org.junit.jupiter.api.DisplayName internal class TodoRepositoryTest { lateinit var repository: TodoRepository lateinit var testItem1: TodoItem lateinit var testItem2: TodoItem @BeforeEach fun setUp() { repository = TodoRepository() testItem1 = TodoItem("Task 1", "Description 1") testItem2 = TodoItem("Task 2", "Description 2") } }JUnit 注解在 Kotlin 中的使用方式, 与在 Java 中相同.
在 Kotlin 中,
lateinit关键字 允许声明非 null 属性, 并在之后进行初始化. 这有助于避免在测试中使用可为 null 的类型(TodoRepository?).
在
TodoRepositoryTest类中添加一个测试, 检查存储库的初始状态及其大小:@Test @DisplayName("Should start with empty repository") fun shouldStartEmpty() { Assertions.assertEquals(0, repository.size()) Assertions.assertTrue(repository.all.isEmpty()) }与 Java 的静态导入不同, Jupiter 的
Assertions是作为类导入的, 并用作断言函数的限定符.你可以在 Kotlin 中以
repository.all的方式将 Java 的 getter 作为属性访问, 而不必调用.getAll().
再编写一个测试, 验证所有条目的复制行为:
@Test @DisplayName("Should return defensive copy of items") fun shouldReturnDefensiveCopy() { repository.add(testItem1) val items1 = repository.all val items2 = repository.all Assertions.assertNotSame(items1, items2) Assertions.assertThrows( UnsupportedOperationException::class.java ) { items1.clear() } Assertions.assertEquals(1, repository.size()) }要从 Kotlin 类获取 Java 类对象, 请使用
::class.java.你可以将复杂的断言拆分为多行, 不需要使用任何特殊的续行字符.
添加一个测试, 验证通过 ID 查找条目的功能:
@Test @DisplayName("Should find item by ID") fun shouldFindItemById() { repository.add(testItem1) repository.add(testItem2) val found = repository.getById(testItem1.id()) Assertions.assertTrue(found.isPresent) Assertions.assertEquals(testItem1, found.get()) }Kotlin 能够与 Java 的
OptionalAPI 无缝协作. 它会自动将 getter 方法转换为属性, 所以isPresent()方法在这里可以作为属性访问.编写一个测试, 验证条目的删除机制:
@Test @DisplayName("Should remove item by ID") fun shouldRemoveItemById() { repository.add(testItem1) repository.add(testItem2) val removed = repository.remove(testItem1.id()) Assertions.assertTrue(removed) Assertions.assertEquals(1, repository.size()) Assertions.assertTrue(repository.getById(testItem1.id()).isEmpty) Assertions.assertTrue(repository.getById(testItem2.id()).isPresent) } @Test @DisplayName("Should return false when removing non-existent item") fun shouldReturnFalseForNonExistentRemoval() { repository.add(testItem1) val removed = repository.remove("non-existent-id") Assertions.assertFalse(removed) Assertions.assertEquals(1, repository.size()) }在 Kotlin 中, 可以链式调用方法和属性访问, 例如
repository.getById(id).isEmpty.
运行测试
运行 Java 和 Kotlin 测试, 验证项目是否正确工作:
使用侧栏图标(gutter icon)运行测试:
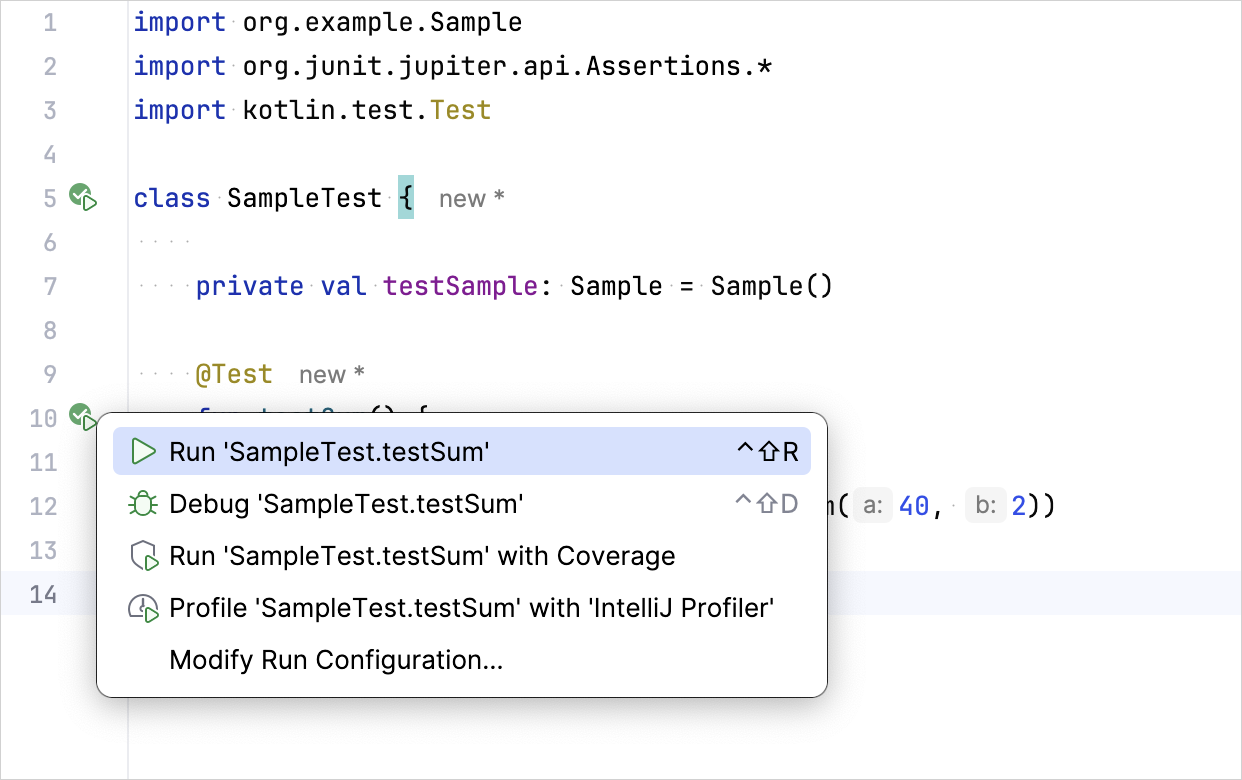
也可以从
initial目录, 使用命令行运行所有的项目测试:mvn test./gradlew test修改某个变量值, 检查测试是否正确工作. 例如, 修改
shouldAddItem测试, 期望出现一个错误的存储库大小:@Test @DisplayName("Should add item to repository") fun shouldAddItem() { repository.add(testItem1) Assertions.assertEquals(2, repository.size()) // 从 1 改为 2 Assertions.assertTrue(repository.all.contains(testItem1)) }再次运行测试, 确认测试失败:
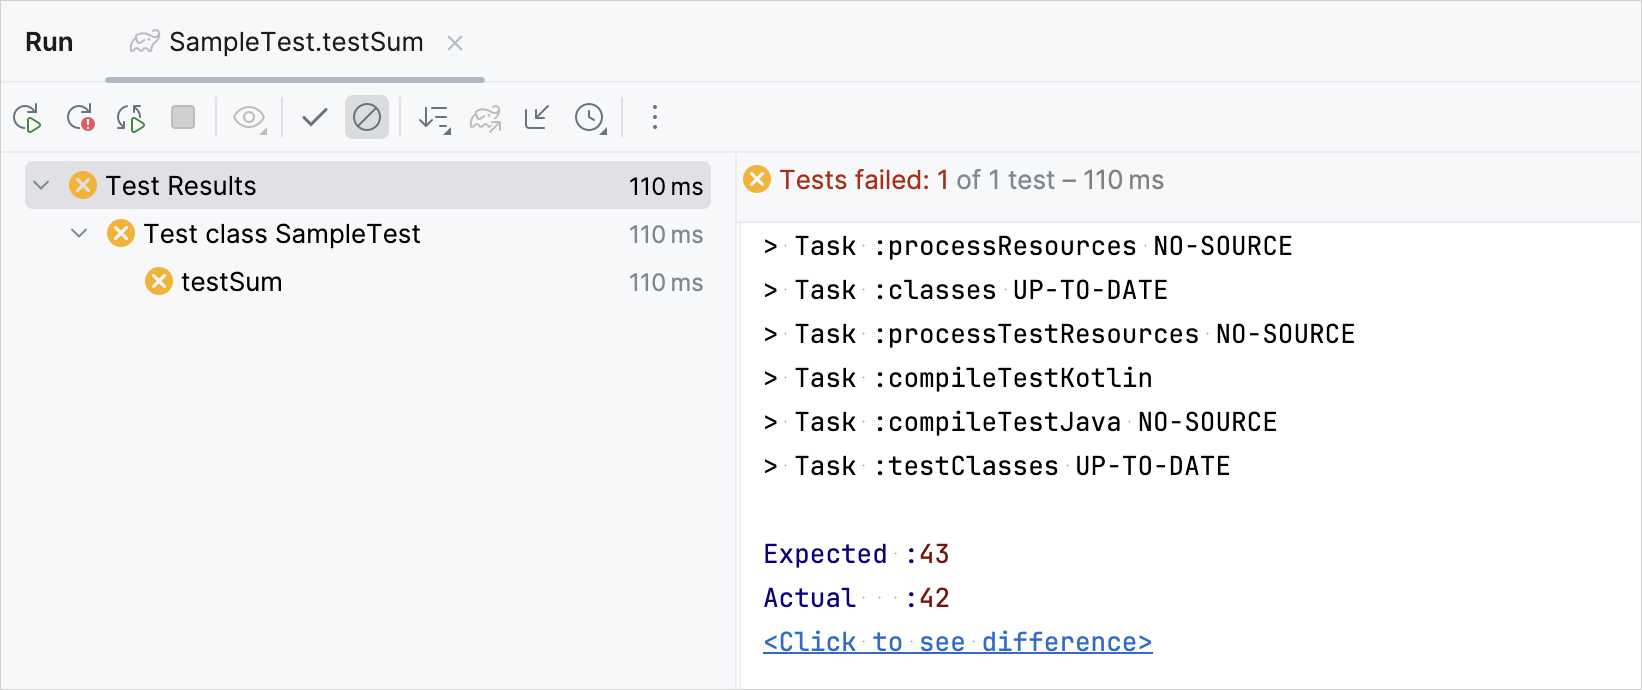
下一步做什么?
了解更多关于 使用 Maven 测试 Kotlin 项目 的内容.